Easy Millionaire Bars Recipe: Decadent Dessert Made Simple
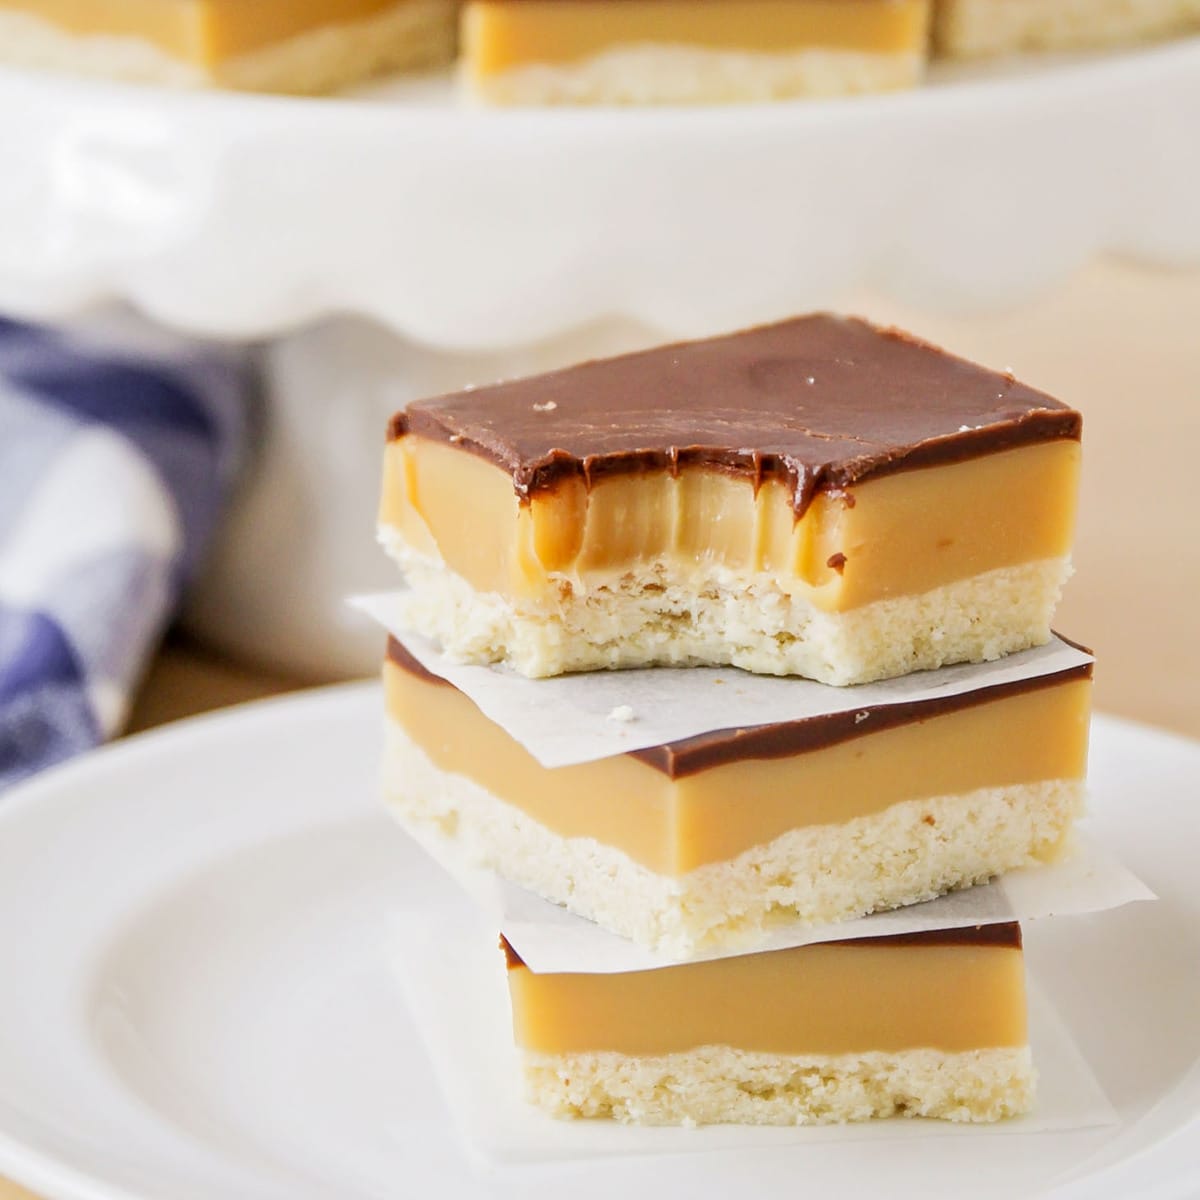
Imagine a dessert so rich, so utterly luxurious, it practically tastes like a million dollars. That's precisely the experience offered by Millionaire Bars. Also known as Millionaire's Shortbread, this British-origin treat traditionally features three magnificent layers: a buttery shortbread base, a thick, gooey caramel center, and a smooth, firm chocolate topping. While their impressive appearance might suggest a complex undertaking, we're here to reveal an incredibly simple secret: you can achieve this decadent delight with a surprisingly easy *no-bake* millionaire bars recipe that eliminates the need for an oven entirely!
This adaptation streamlines the process, transforming a classic showstopper into an accessible, crowd-pleasing dessert that's perfect for any occasion. Whether you're a seasoned baker or a complete novice, get ready to whip up a batch of these irresistible bars and taste what true dessert decadence is all about.
The Allure of Millionaire Bars: A Taste of Decadence
The name "Millionaire Bars" isn't just a clever marketing ploy; it perfectly encapsulates the opulent experience these treats deliver. Each bite offers a symphony of textures and flavors: the satisfying crispness of a unique, no-bake base, the luxurious chew of golden caramel, and the snap of rich chocolate. It’s a dessert that feels incredibly special, yet our simplified recipe ensures it’s well within reach for anyone craving a taste of luxury without the fuss.
While the concept of shortbread dates back centuries in Scotland, the brilliant combination of shortbread, caramel, and chocolate is a more modern innovation, believed to have emerged in the 20th century. This layered marvel quickly gained popularity, becoming a staple in bakeries and homes across the UK and beyond. Our particular approach pays homage to that richness while offering a brilliant shortcut, proving that you don't need to spend hours in the kitchen to achieve a truly impressive dessert. For a deeper dive into the different approaches, explore our comparison of
No-Bake vs. Classic Millionaire Bars: Choose Your Decadent Treat.
Unlocking the Secret to Our Easy No-Bake Millionaire Bars Recipe
The genius of our easy millionaire bars recipe lies in its no-bake foundation. Instead of a traditional baked shortbread, we create a crunchy, flavorful base using everyday ingredients like crispy cereal and roasted peanuts, bound together with a luscious, melted caramel mixture. This not only saves time but also adds an exciting textural dimension that sets these bars apart. The result is a dessert that's incredibly satisfying and surprisingly quick to assemble.
The key to success with this recipe is quality ingredients and working efficiently. While the process is simple, some steps require a bit of speed to ensure everything comes together beautifully.
Here’s what you’ll need to create your own batch of these irresistible treats:
Ingredients:
- 1 (11-ounce) bag of soft caramels (pre-wrapped or blocks, unwrapped)
- 1/4 cup unsalted butter
- 2 tablespoons heavy cream
- 4 cups crispy cereal (such as Rice Krispies or cornflakes)
- 1 cup roasted peanuts (or your preferred nuts like pecans or cashews), lightly chopped
- 12 ounces semi-sweet chocolate chips (or your preferred type)
- Flaky sea salt, for sprinkling (optional, but highly recommended)
Step-by-Step Guide to Your Decadent Millionaire Bars
Making these bars is less about complex techniques and more about careful layering and chilling. Follow these steps, and you’ll be enjoying your homemade millionaire bars in no time.
- Prepare Your Pan: Line a 9x9-inch square baking pan with aluminum foil or parchment paper, leaving an overhang on the sides. This "sling" will make lifting the finished bars out incredibly easy. Grease the foil/parchment well with butter or cooking spray to prevent sticking.
- Melt the Caramel Base: In a medium saucepan, combine the unwrapped caramels, butter, and heavy cream. Heat over low heat, stirring frequently, until the caramels are completely melted and the mixture is smooth and glossy. The key here is low and slow heat to prevent scorching.
- Create the Crispy Base: Once the caramel mixture is smooth, remove the saucepan from the heat. Quickly stir in the crispy cereal and chopped roasted peanuts. Work quickly but thoroughly to coat all the cereal and nuts evenly with the caramel.
- Press into Pan: Immediately transfer the cereal mixture to the prepared baking pan. Using a buttered spatula or your lightly greased hands, press the mixture down firmly and evenly into the bottom of the pan. Ensure it's compact and flat; this forms your solid base.
- Chill the Base: Place the pan in the refrigerator for about 15-20 minutes to allow the caramel base to set slightly while you prepare the chocolate topping.
- Melt the Chocolate: In a microwave-safe bowl, melt the chocolate chips. Heat on High in 30-second intervals, stirring well after each interval, until the chocolate is completely smooth and melted (this usually takes 1-2 minutes total). Alternatively, you can use a double boiler for a gentler melt.
- Add the Chocolate Layer: Pour the melted chocolate evenly over the slightly chilled caramel-cereal base. Use an offset spatula or the back of a spoon to gently spread the chocolate to the edges, creating a smooth, even layer. If desired, sprinkle flaky sea salt over the wet chocolate for a beautiful finish and an incredible flavor contrast.
- Chill Until Set: Return the pan to the refrigerator and chill for at least 2 hours, or until the chocolate layer is completely firm. This is crucial for clean slicing.
- Slice and Serve: Once fully set, use the foil/parchment overhangs to lift the entire slab out of the pan. Place it on a cutting board. For the cleanest cuts, use a large, sharp knife warmed under hot water (and wiped dry) to slice into squares or bars. Wipe the knife clean between cuts.
Mastering Your Millionaire Bars: Expert Tips & Creative Twists
While the core recipe is straightforward, a few expert tips can elevate your millionaire bars from great to absolutely unforgettable. Plus, we'll dive into some creative variations to make these bars truly your own.
- The Unsung Hero: Flaky Sea Salt
Don't skip the sea salt! A generous sprinkle of flaky sea salt on top of the melted chocolate layer is not just for aesthetics; it's a game-changer for flavor. The subtle saltiness cuts through the richness of the caramel and chocolate, enhancing their flavors and creating that coveted "salted caramel" effect. It adds depth and dimension that truly makes all the difference.
- Perfect Layers Every Time
Patience is a Virtue: While this is a fast recipe, ensure each layer has a moment to cool and firm up slightly before adding the next. This prevents the layers from bleeding into each other and ensures distinct, beautiful lines when you slice.
Pan Lining: Using parchment paper with an overhang is often preferred over foil, as it's less prone to tearing and sticking. Make sure it's greased well regardless of your choice.
Clean Cuts: As mentioned in the directions, a warm, clean knife is your best friend for achieving professional-looking slices. This prevents the chocolate from cracking and dragging through the caramel. For more detailed advice on achieving perfect layers and professional tips, check out Perfect Millionaire Shortbread: Layers, Salt, & Pro Tips.
- Customization is Key
Nut Substitutions: Not a fan of peanuts? Swap them out for toasted almonds, pecans, walnuts, or even macadamia nuts. Each will lend a unique flavor profile.
Cereal Choices: While crispy rice cereal is traditional for its light texture, you could experiment with crushed cornflakes or even a mixture of different cereals for more crunch.
Chocolate Variations: Semi-sweet chocolate provides a classic balance, but feel free to use dark chocolate for a richer, more intense flavor, or milk chocolate for a sweeter, creamier finish. You can even drizzle white chocolate swirls on top for an elegant touch.
Extra Toppings: Beyond sea salt, consider adding a sprinkle of shredded coconut, mini chocolate chips, or a drizzle of caramel sauce before the chocolate sets for even more indulgence.
- Storage and Shelf Life
Millionaire bars keep exceptionally well! Store them in an airtight container in the refrigerator for up to 5 days. For longer storage, you can freeze them for up to 1-2 months. To freeze, slice the bars, place them on a parchment-lined tray until firm, then transfer them to a freezer-safe container with parchment paper between layers. Thaw in the refrigerator before serving.
- Troubleshooting Common Issues
Sticky Caramel Base: Ensure you press the cereal mixture firmly into the pan and give it enough time to chill before adding the chocolate. If it’s still too sticky, a little extra chilling time can help.
Chocolate Cracking: This often happens if the chocolate layer is too thick or if the bars are too cold when sliced. Let them sit at room temperature for 5-10 minutes before cutting, and use a warm knife.
Caramel Scorching: When melting the caramels, always use low heat and stir constantly. High heat is the enemy of smooth, unburnt caramel.
This easy millionaire bars recipe proves that you don't need a culinary degree to create a show-stopping dessert. With minimal effort and maximum flavor, these decadent bars are guaranteed to impress anyone lucky enough to get a taste. The combination of crispy texture, gooey caramel, and rich chocolate, all finished with a touch of flaky sea salt, creates an experience that truly lives up to its opulent name. So, roll up your sleeves, gather your ingredients, and get ready to indulge in homemade luxury!